I’m 3D Printing a Life-Size Jabba the Hutt
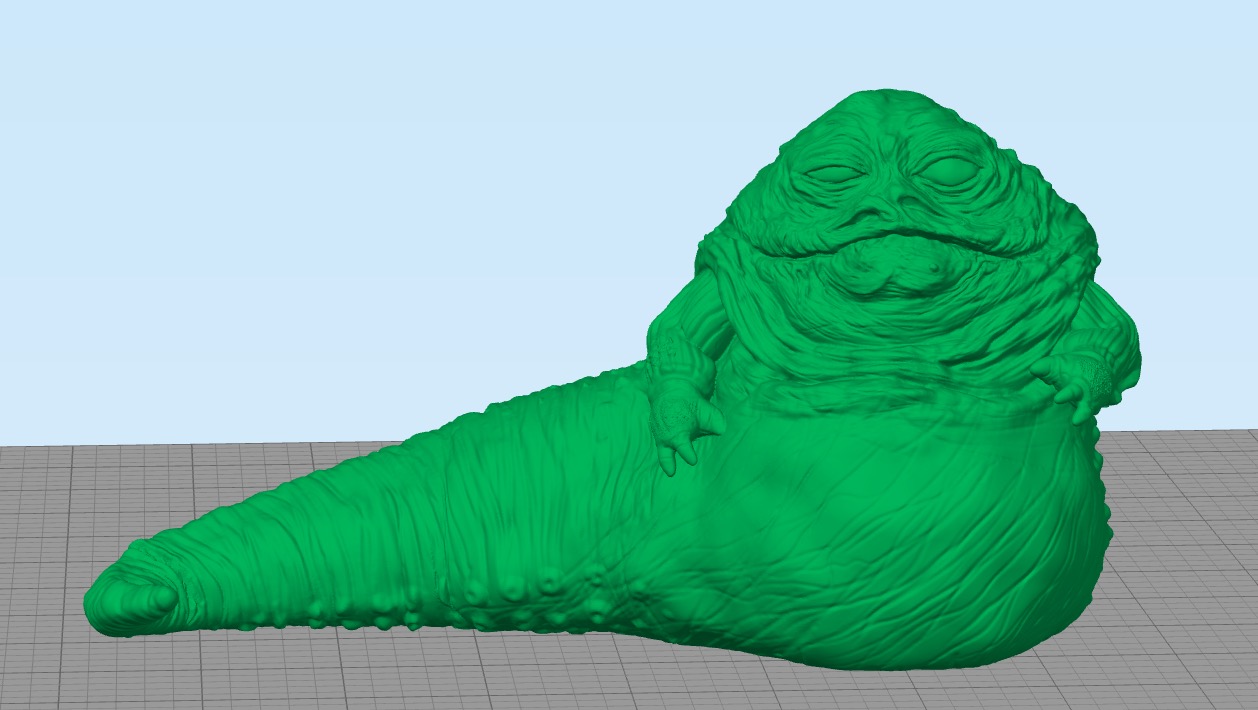
The model I am printing
I realized recently that I’ve never posted about this project in my website, even though it’s been taking up a lot of my time and energy on my YouTube channel for the last few months. Not everyone who reads the site is a subscriber to my channel, and having a blog post can sometimes help attract attention to something in ways that just a YouTube video can’t, so I thought I would talk about it a bit here.
I started incorporating 3D printing into my YouTube channel a little over two years ago, starting with a print of the Jabba from the Disney Infinity video game, and working my way through a number of projects, including recreating vintage unlicensed ceramic figures, making life size versions of vintage Kenner action figure weapons like Han’s blaster, a stormtrooper blaster, or Luke saber, and trying to make my own version of the Jabba cookie originally released by Pepperidge Farm in 1983. There’s now quite a playlist of 3D printing-related videos if you’re interested.
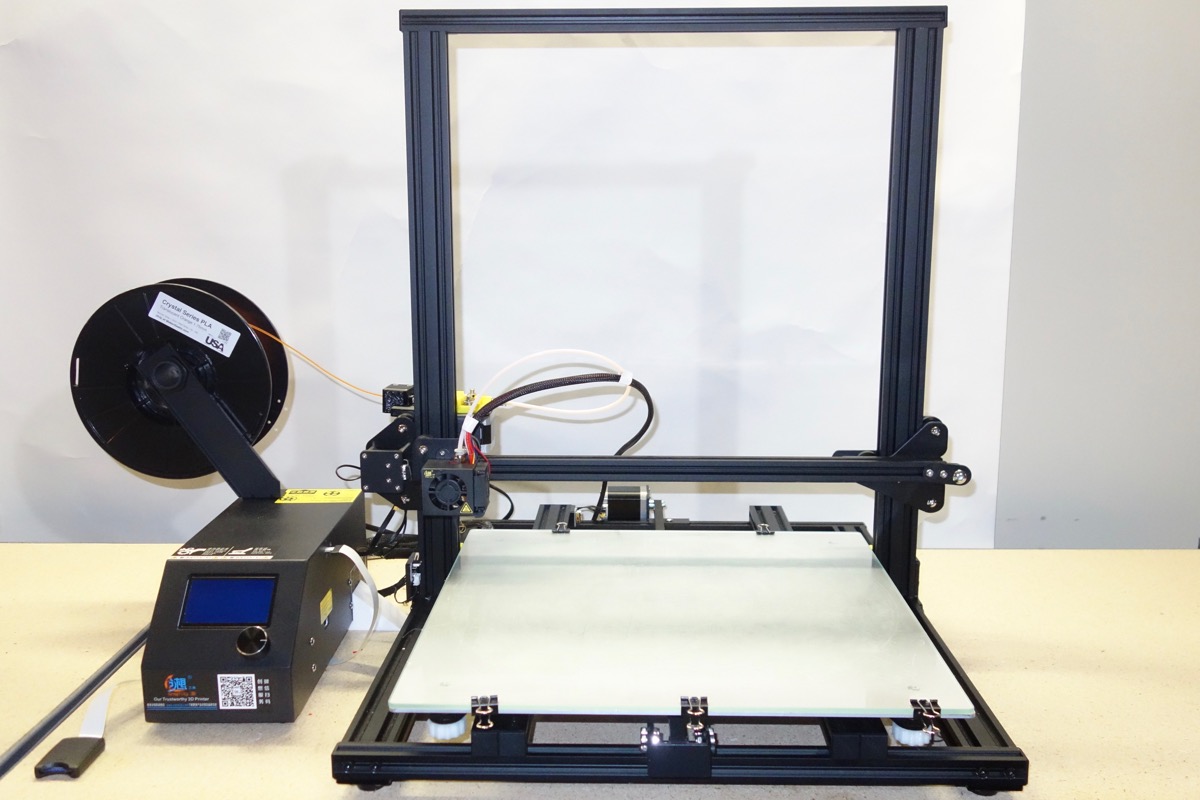
Creality CR-10 S4 3D printer
I have also been reviewing 3D printers on my channel for a while, and that has allowed me to build up an arsenal of large printers, such as the Creality CR-10 S4 and S5 that I am using for this project. This got me thinking about what I could use them for, and eventually I hit upon the idea of making a series of videos about printing a life-size Jabba the Hutt. The first step was to find a decent 3D model of Jabba, since the ones commonly available for download weren’t very good, and were definitely not suitable for printing at life size. So I ended up reaching out to Josh Smith at Beast Toys. Josh does 3D modeling on commission and was able to create a very respectable Jabba model, with some input from me. I did a test print at roughly 1/6 scale, which you can see below, and I think it turned out quite well.
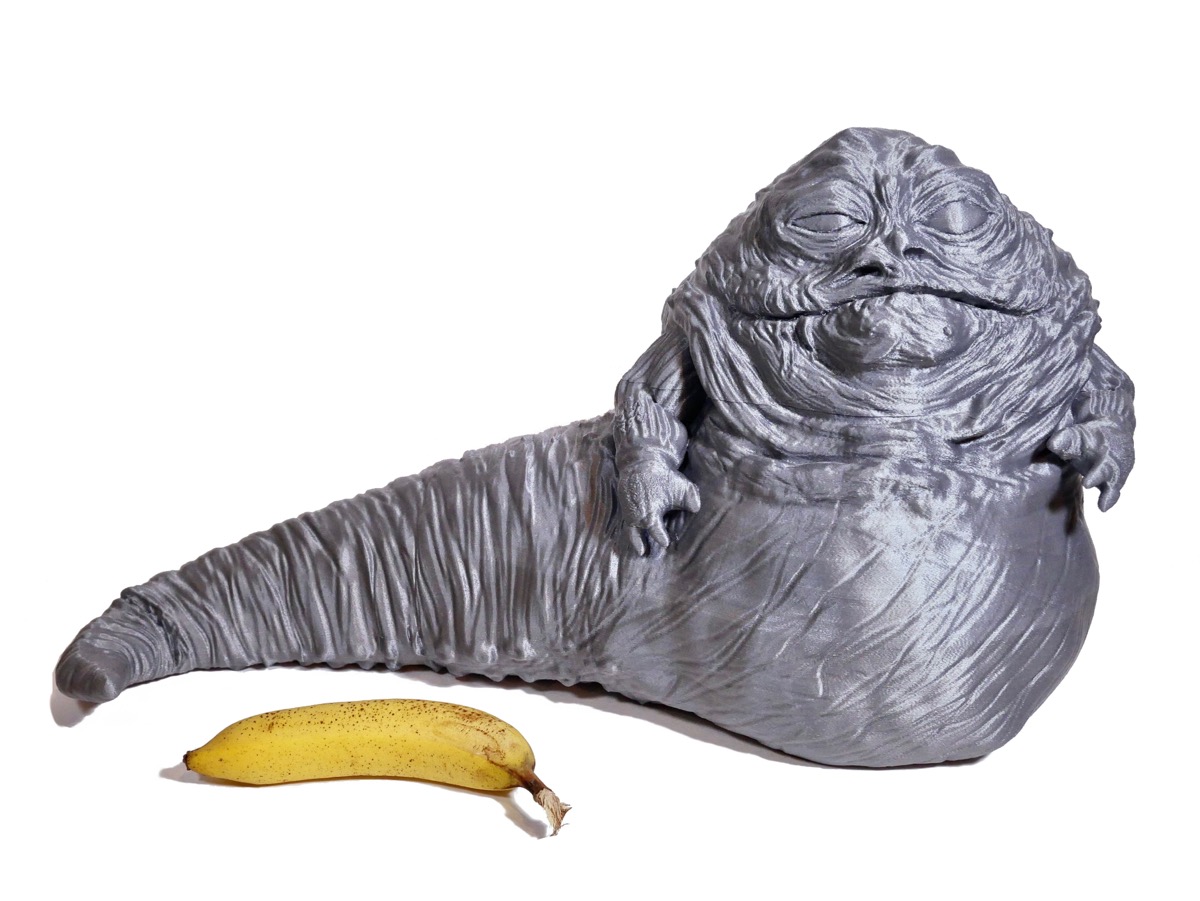
My new banana. 3D printed Jabba for scale
However, printing this at life size would be a different matter. I would of course need to split up the model into many pieces, and it seemed to me that the best idea would be to hollow it out and just print a shell that I would glue together. I figured this would dramatically decrease the time and filament required, although it would still be a huge undertaking. I ended up with around 70 sections, most of which were fairly large and would each take 15-24 hours to print.
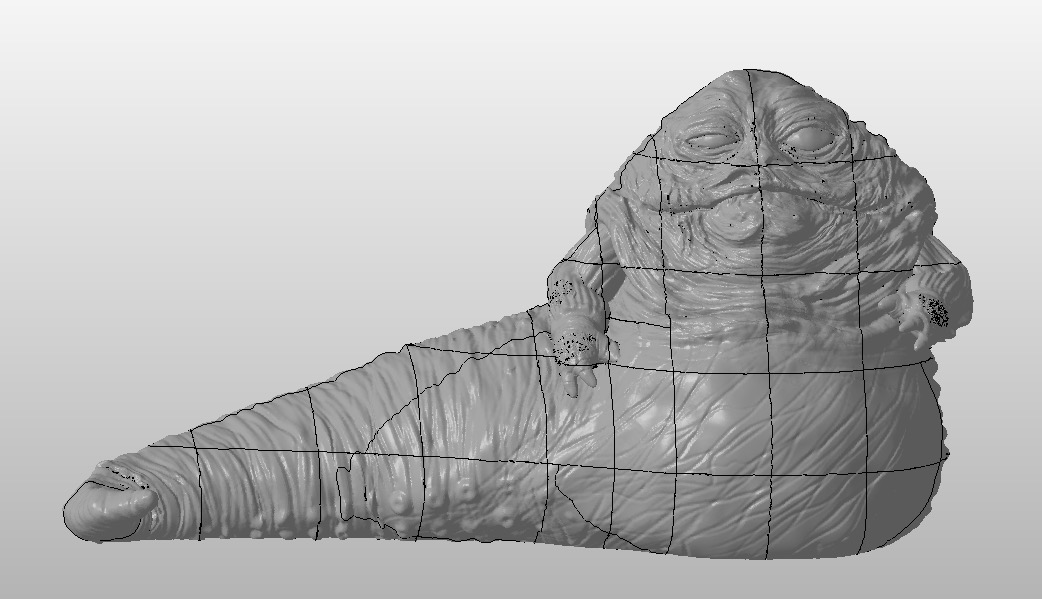
The model cut up into printable sections.
Here’s one section getting printed on the Creality CR-10 S4.
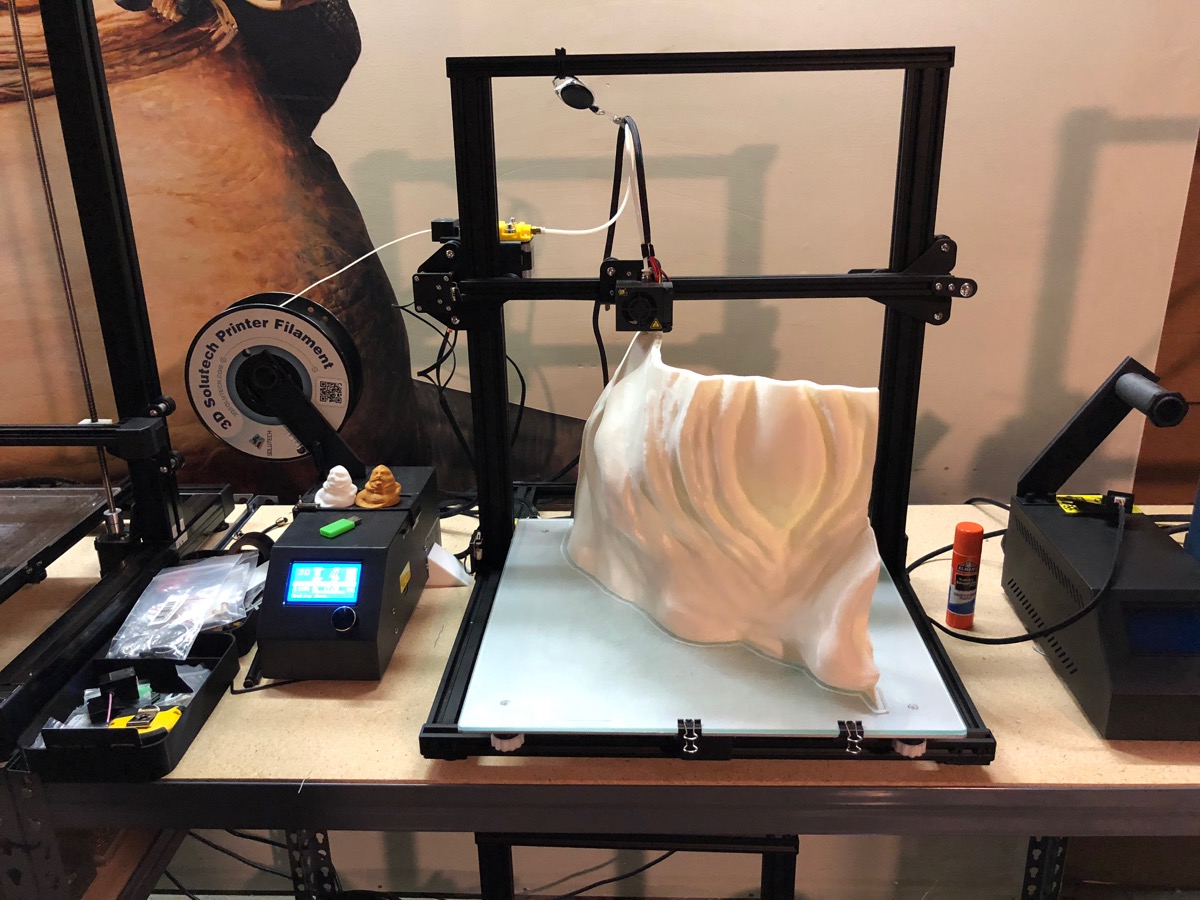
Printing part of Jabba’s face
After printing the first few sections and gluing them together I was left with the front half of Jabba’s head, which looked surprisingly good and made me pretty optimistic that the approach I was using was going to work. I had scaled the model based on my life size bust of Jabba the Hutt, which was taken from an unused latex face mold from Return of the Jedi. (The Gamorrean Guard head I’m wearing is a life-size bust that I printed. It’s not really a mask since there are no eye holes.)
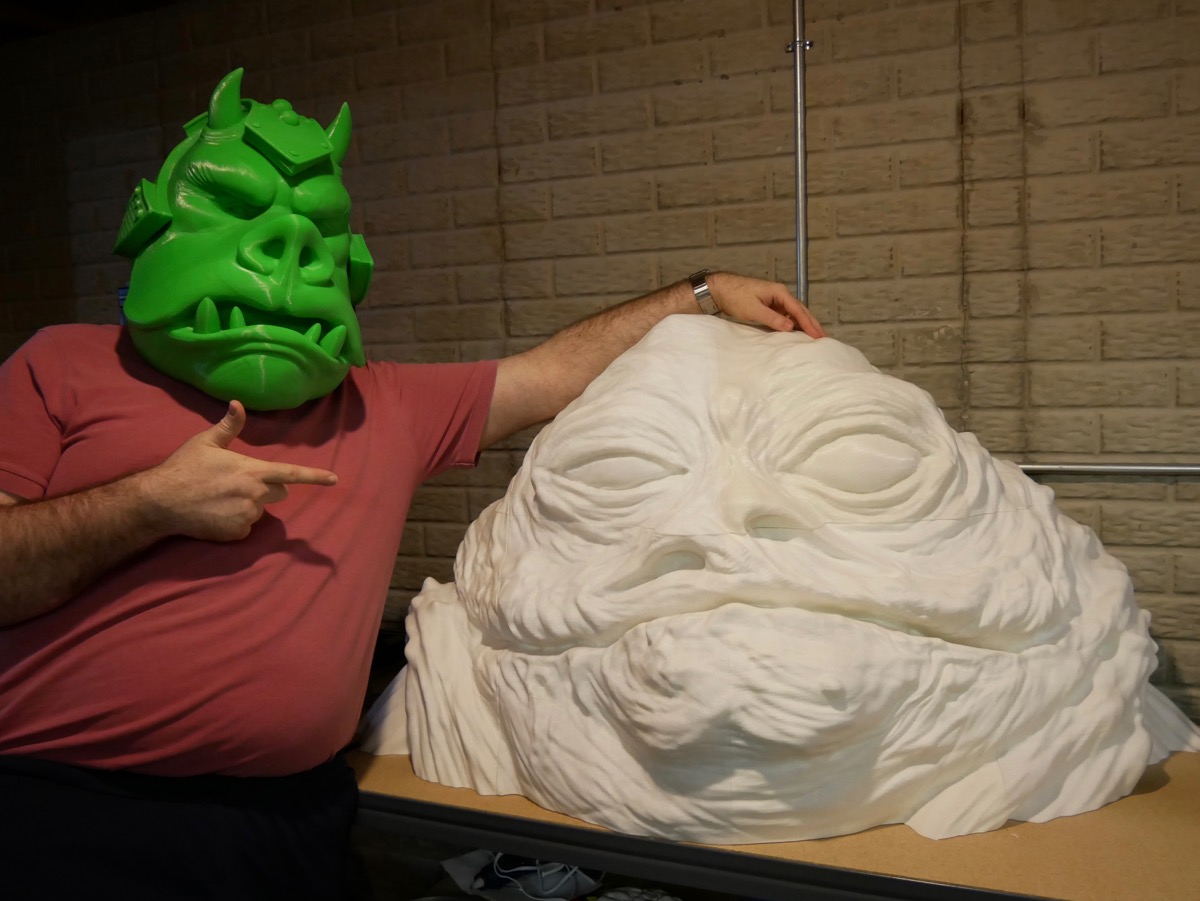
Just chillin’ with my homie Jabba
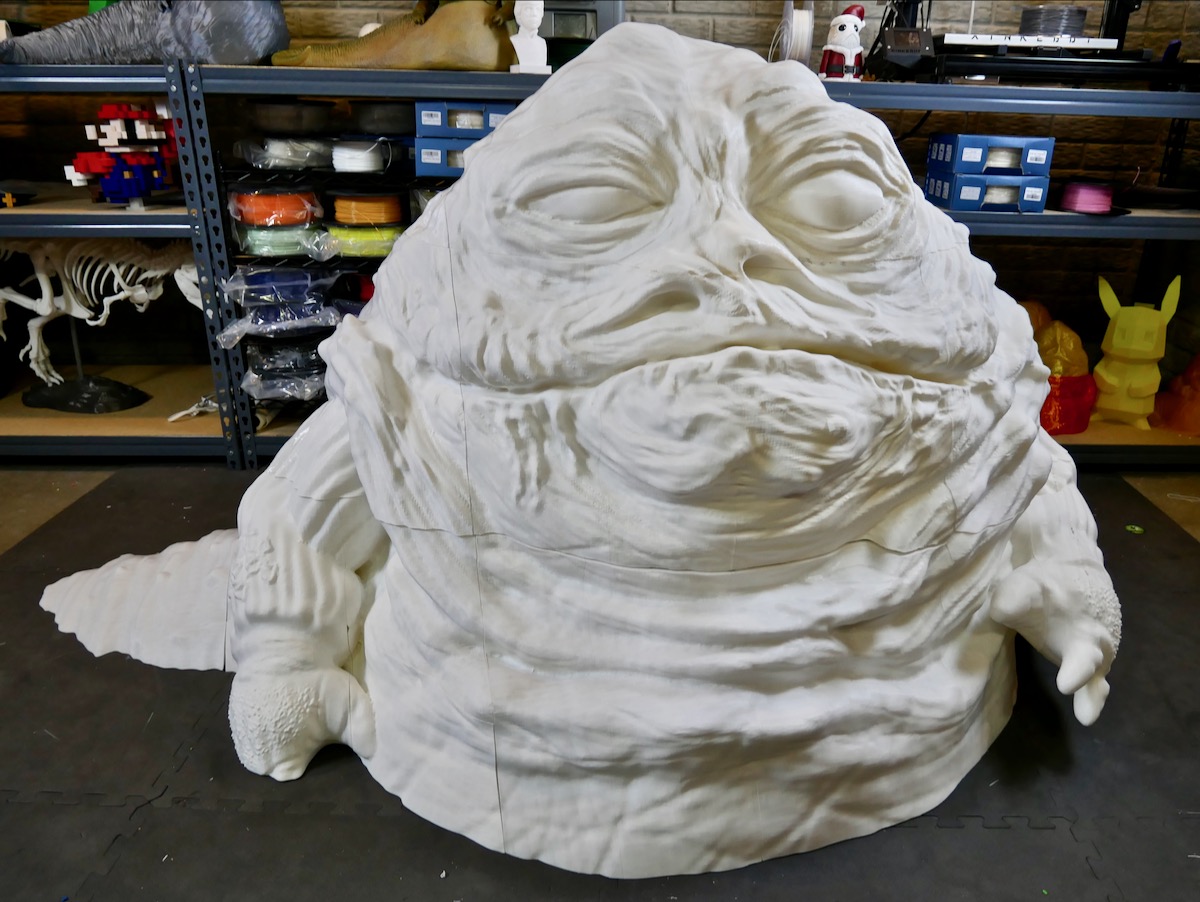
However, I did notice after making some more progress that the proportions of the 3D model were off — the head and arms were a bit too big relative to the rest of the body. So that means that while the head/arms/torso of my version will be life size, the tail is going to be shorter than it should be. I should have noticed this during the design phase, but I was too focused on getting the details of the face right. But even with a stubby tail, he’s going to be roughly 6′ tall by 10′ long, and even as a hollow shell, it would take hundreds of dollars worth of filament. It occurred to me that a filament maker might be interested in sponsoring this project, so I got in touch with MakerGeeks, which is a US-based filament company whose filament I use pretty frequently. They were quite interested and agreed to send along some filament for me to start printing the rest of Jabba. They even gave my viewers/readers a coupon code “JABBA” that can be used to get 15% off.
With the second layer done.
As you can see below, I now I have much of the statue finished, although the bottom layer will undoubtedly take the longest to print. For the most part, things have gone well. I encourage you to check out the Part 1, Part 2 and Part 3 videos if you’re interested in the details. I do plan on painting and finishing this later, but that will probably take a while. I will be releasing the 3D model for free once I have finished the printing part of the project, so if you want a good Jabba model to print at any size from action figure to life size, this will be a good option.
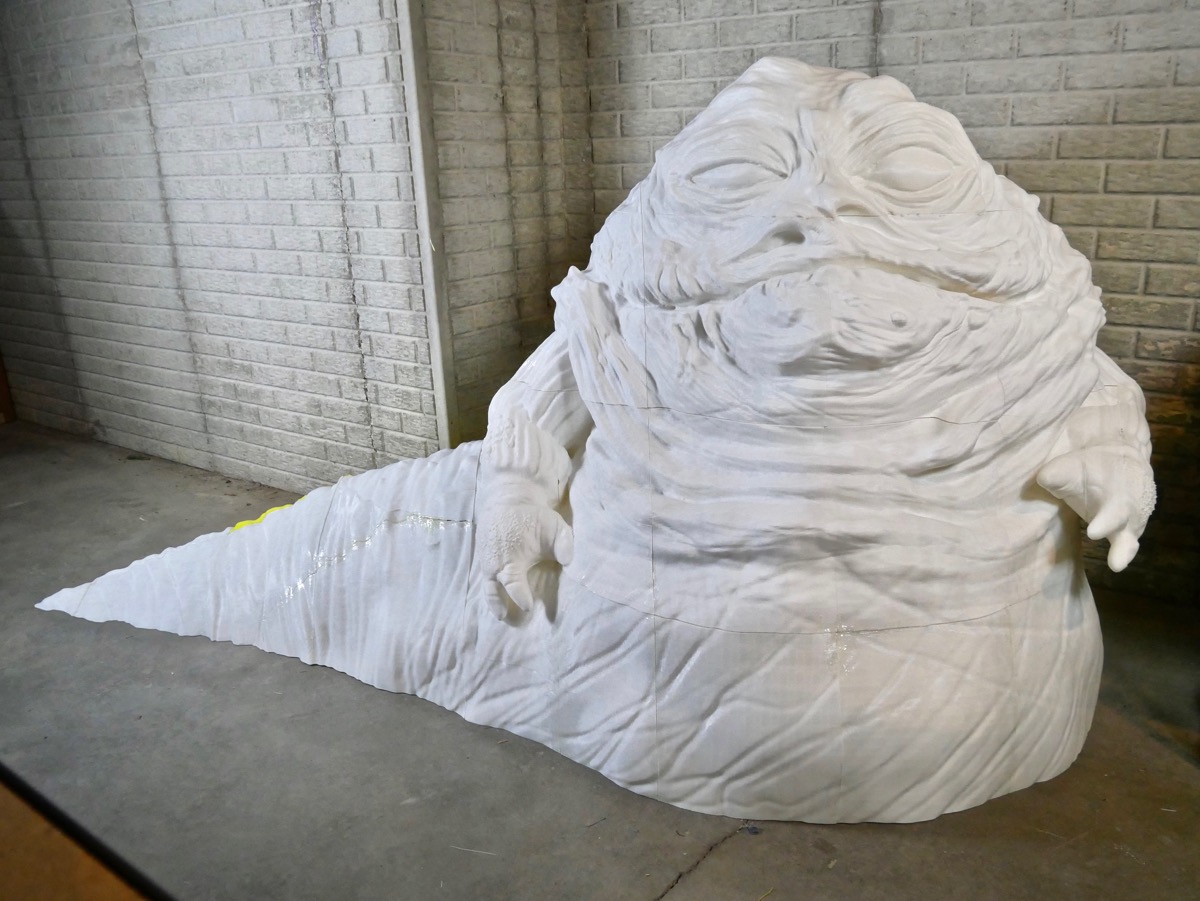
My 3D-printed Jabba the Hutt statue in progress. He’s roughly 3/4 finished.


That is truly amazing!
Someone gave me a 6″ one at a convention, but that is dwarfed by this project.
Thanks for stopping by, Toby! (For anyone who is not aware, Toby was one of the puppeteers inside the original Jabba puppet, and was in charge of Jabba’s left arm and tongue.)
WOW!!! What an absolutely amazing and barmy project. 🙂
Where are you going to put him?
He’s just going to stay in my basement, which is where I have my little army of 3D printers. Anyway, there’s literally no other place I could put him.